A few weeks ago I finished a gallery wall along our stairway and since it wasn't as easy as I thought it would be I wanted to share what I learned along the way!
I have been collecting frames over the past months in anticipation of this project. I ended up repurposing some frames I already had with a fresh coat of spray paint and found the majority of the others at TJ Maxx and Marshalls.
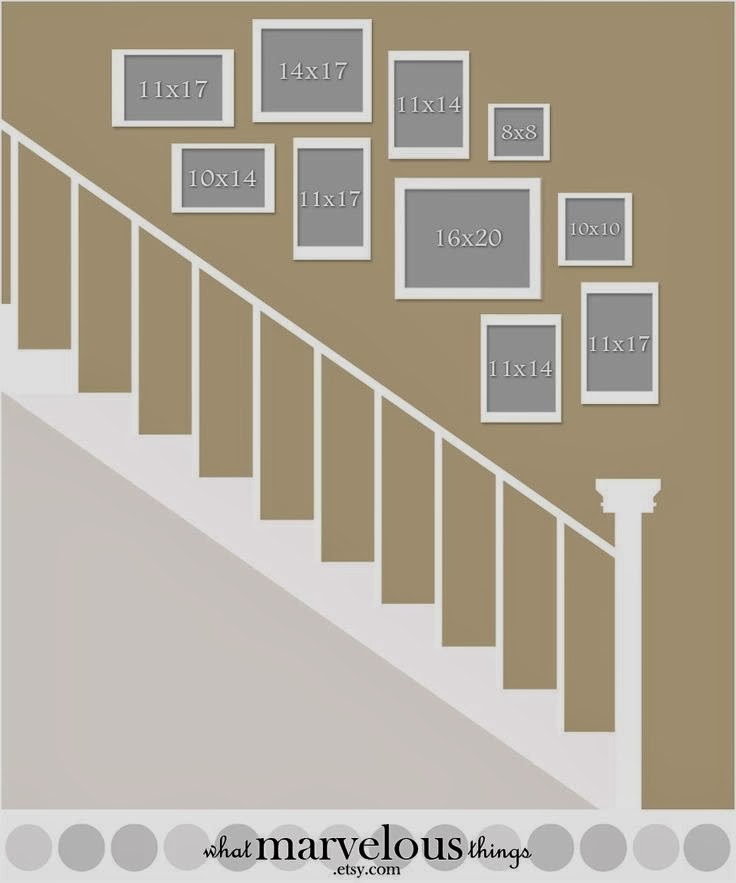
When I started the process I thought after moving the frames around a few times, the perfect layout would unfold. I think I spent about 20-30 minutes trying to rearrange frames and then realized I needed
a better plan. Having a layout, like the one pictured below is tremendously helpful.
Tip #1: Have an example layout of what you want the gallery wall to look like. I found the above example on pinterest.
Dainelle Sara's photography website has some great options also!
After finding the layout, I followed the general idea and laid out the frames on the floor. I recommend laying the frames out first to make sure it looks the way you want.
Tip #2: Lay your design out on the floor first to ensure the look you want.
Then, I traced each frame on wax paper and cut out an example of each to hang on the wall. This process is tedious but well worth it.
Tip #3: Use wax paper to trace the frames and place the desired layout on the wall.
Using the wax paper lets you move the frames around and get the proper spacing between each. I didn't measure the spacing but eyeballed it. The wax paper also lets you easily secure the nail and tear the paper off.
Once I had the frames on the wall, I decided on the photos and artwork for each. To me it was easier to determine what I wanted with the frames on the wall, especially since the wall color and lighting may make things look different.
Tip #4: Once your frames are on the wall, determine what photos and art you want to fill the frames. Wall color and lighting can make things look different.
I tried to use a variety of prints, art, and photos that are meaningful to us.
I found the faith printable online.
Tip #5: Use a variety of prints, art, and photos to make the wall more interesting. Choose things that have meaning to you.
I've seen others use objects as well in their gallery walls to give more variety.
I chose photos with similar tones and edited all the photos used in a similar way to have consistent brightness and colors.
Tip #5: Use photos, arts, and prints with similar colors and tones for consistency throughout the gallery wall.
I made this print by using a gold ink pen and writing on black construction paper. I used a similar graphic I found on pinterest as my example.
As mentioned above, to me, choosing pieces that had meaning to us was important. I thought this simple print was a perfect reminder of the importance of gratitude!
Tip #6: Don't be afraid to create your own pieces! Remember they don't have to be perfect.